The Omicron Control Center (OCC) is a test document that is use to combine multiple test modules in a single file like archive file. A single OCC file can be used to test a relay completely, rather than the multiple individual test modules.
On the Test Universe start page, by start clicking new test document under control center. This will open a new blank OCC file.

The OCC is basically divided into four sections:

The field references are the placeholder of a certain information that defined on the document properties e.g., title, subject, company, etc. There are 20 user defined field that can be access through the script in the Script View

OCC test document has a page header and page footer which is used to place some information to display when the reports are printed like filename, page number, page count and etc.

OCC test document has a test object by default. It means that you only enter the settings for the test object once for all the test modules underneath. Meaning, the test object must be placed on the very top of the list. To open it, right click on it and select open or double click on it and XRIO application will open. XRIO is an omicron abbreviation which stands for eXtended Relay Interface by Omicron and RIO is stands for Relay Interface by Omicron. RIO made to map the behavior of the protection device regardless of its manufacture. But, it has a certain limits which are imposed by the content of the specific RIO functions used. XRIO take away those limitations. The users can now create parameters and used formulas to interlink into RIO functions.

The hardware configuration is very similar to the test object. This will applies to all subsequent test modules. This is the global hardware configuration in the OCC. Each test module has a local configuration, it will inherit the global hardware configurations.

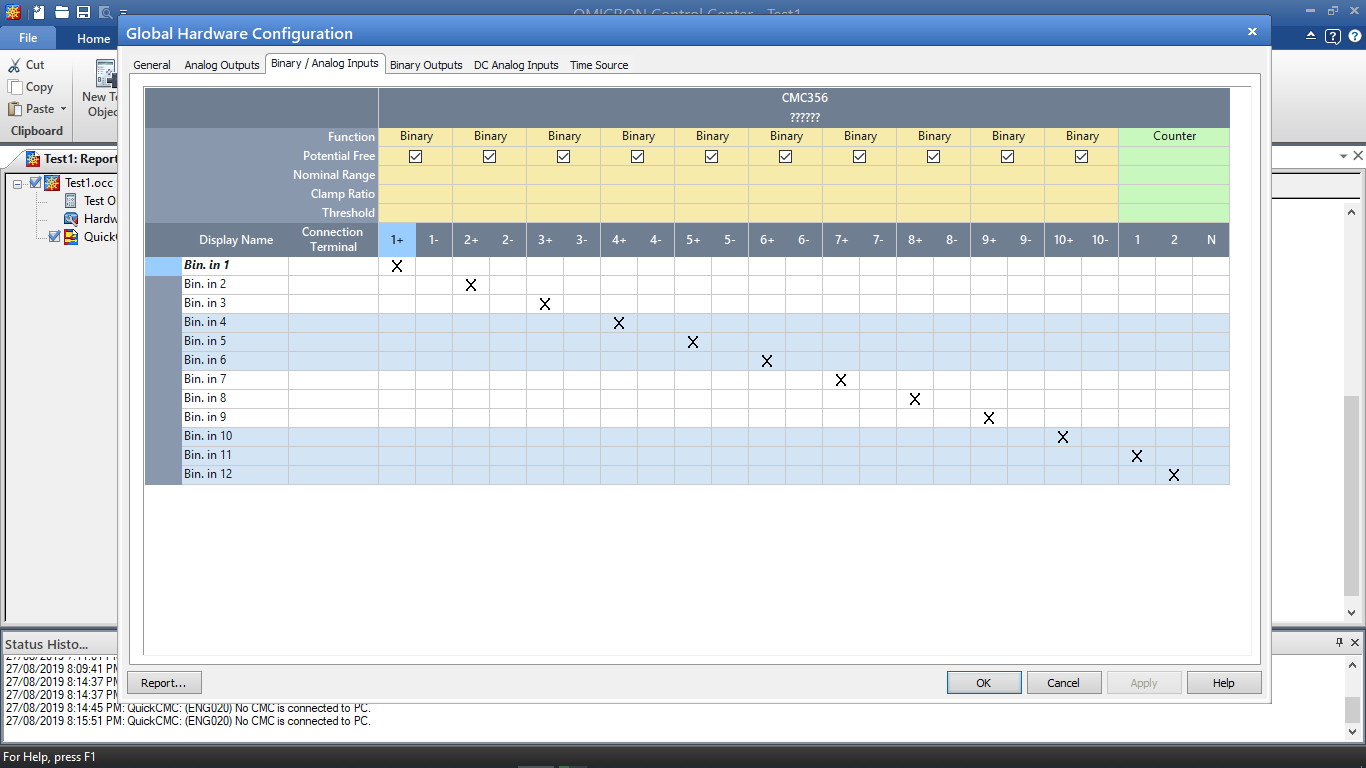
There are difference between global and local hardware configuration. The global hardware configuration, here you can set the output configuration details depends on what is required on you testing. Also you can set here the analog output terminals, binary/analog input terminals and binary outputs terminal and its display name and connection terminal.

The local hardware configuration will inherits the global hardware configuration and you can't change the display names and its connections. The only thing you can change here are the test module outputs and inputs of each terminals.

Binary/analog inputs are part of hardware configurations. This will be triggered by the relay to start or stop timer or testing. All the tripping, closing or initiate signals coming from the relay can be define here as well as analog signal to be measured like voltage and current. And also, you can set the binary input as potential free of wet contact.

Binary output in the hardware configuration, unlike binary inputs, this will give signal to the relay to simulate the required signals in the relay testing.

Time source is another hardware module which can be use to synchronize multiple CMC devices. This is very useful in the end-to-end testing of the line protection.

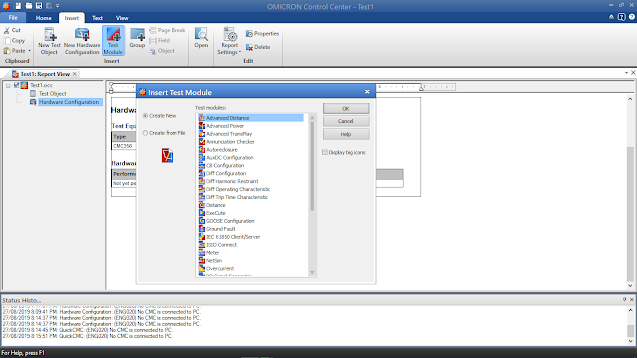
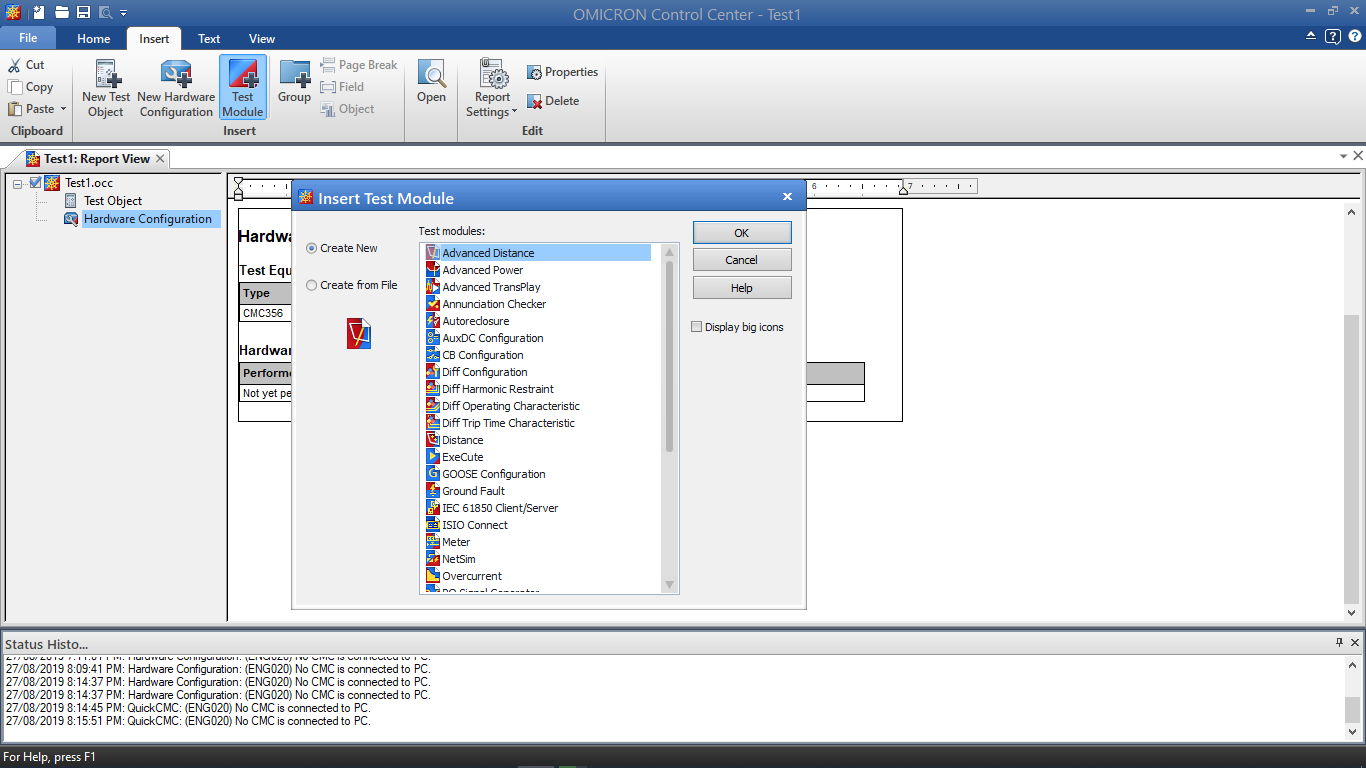
Inserting a test module can be done by clicking the test module in the ribbon control under insert tab. Make sure that the test module is inserted under the hardware configuration. The are two option of inserting test module. The first one is create new and the next one is create from file. Once the test module is inserted, you can rename it.
And also, you can group the set of modules to make it tidy or organized. Just click the group button in the ribbon control under the insert tab. Once the group folder is created, you can rename it as well.

That's it. See you next time.
On the Test Universe start page, by start clicking new test document under control center. This will open a new blank OCC file.

The OCC is basically divided into four sections:
- Test Modules Tree List on the left side
- Report pane on the right side
- Ribbon control on the top
- Status history on the bottom
- In the Report View, we can customize the overall report.
- In the List View, displayed all the test modules or objects embedded in the test document.
- In the Script View, we can write and run scripts to control the test document.

The field references are the placeholder of a certain information that defined on the document properties e.g., title, subject, company, etc. There are 20 user defined field that can be access through the script in the Script View

OCC test document has a page header and page footer which is used to place some information to display when the reports are printed like filename, page number, page count and etc.

OCC test document has a test object by default. It means that you only enter the settings for the test object once for all the test modules underneath. Meaning, the test object must be placed on the very top of the list. To open it, right click on it and select open or double click on it and XRIO application will open. XRIO is an omicron abbreviation which stands for eXtended Relay Interface by Omicron and RIO is stands for Relay Interface by Omicron. RIO made to map the behavior of the protection device regardless of its manufacture. But, it has a certain limits which are imposed by the content of the specific RIO functions used. XRIO take away those limitations. The users can now create parameters and used formulas to interlink into RIO functions.

The hardware configuration is very similar to the test object. This will applies to all subsequent test modules. This is the global hardware configuration in the OCC. Each test module has a local configuration, it will inherit the global hardware configurations.

There are difference between global and local hardware configuration. The global hardware configuration, here you can set the output configuration details depends on what is required on you testing. Also you can set here the analog output terminals, binary/analog input terminals and binary outputs terminal and its display name and connection terminal.

The local hardware configuration will inherits the global hardware configuration and you can't change the display names and its connections. The only thing you can change here are the test module outputs and inputs of each terminals.

Binary/analog inputs are part of hardware configurations. This will be triggered by the relay to start or stop timer or testing. All the tripping, closing or initiate signals coming from the relay can be define here as well as analog signal to be measured like voltage and current. And also, you can set the binary input as potential free of wet contact.
Binary output in the hardware configuration, unlike binary inputs, this will give signal to the relay to simulate the required signals in the relay testing.

Time source is another hardware module which can be use to synchronize multiple CMC devices. This is very useful in the end-to-end testing of the line protection.

Inserting a test module can be done by clicking the test module in the ribbon control under insert tab. Make sure that the test module is inserted under the hardware configuration. The are two option of inserting test module. The first one is create new and the next one is create from file. Once the test module is inserted, you can rename it.
And also, you can group the set of modules to make it tidy or organized. Just click the group button in the ribbon control under the insert tab. Once the group folder is created, you can rename it as well.

That's it. See you next time.
Comments
Post a Comment